

Feel cramped working on your laptop’s small screen? Hooking up your laptop to a desktop display lets you rock a dual-monitor setup, plus you also get more screen real estate to see everything that’s open and use it for multitasking, gaming or creative work.
Whether you’re working from home, tearing through editing or just tired of the calcified laptop viewing experience, learning how to hook up your laptop to a desktop monitor gives you a powerful second-screen experience. It is surprisingly easy, but there are a handful of things you need to know about cables, ports and display drivers.
In this guide, I will walk you through everything you need to know, from finding the right connections to making the most of your setup with dual screens. By the end you’ll have a clear view on how to grow your digital workspace and increase productivity.
Understanding Display Ports and Cables
Before diving into how to connect a laptop to a desktop monitor, let’s talk about the various ports and cables you’ll encounter. Modern laptops and monitors come with different connection options, and knowing which one you have makes the setup process much smoother.
Common Display Port Types
HDMI (High-Definition Multimedia Interface) is probably the most common connection you’ll find. It carries both video and audio signals, making it incredibly convenient. Most laptops manufactured in the last decade have at least one HDMI port, and nearly all modern monitors support it.
DisplayPort offers similar functionality to HDMI but often supports higher refresh rates and resolutions. You’ll typically find this on gaming laptops and professional-grade monitors. Some newer laptops use the smaller USB-C format that supports DisplayPort signals.
USB-C/Thunderbolt ports are becoming increasingly popular, especially on ultrabooks and MacBooks. These versatile ports can transmit video, audio, data, and even power through a single cable. If your laptop has USB-C with video output capability, you’re in luck—it’s one of the most flexible options available.
VGA (Video Graphics Array) is the old-school analog connection with blue connectors and screws on the sides. While largely obsolete, you might still encounter it on older equipment. VGA only carries video signals, so you’ll need a separate audio cable if your monitor has speakers.
DVI (Digital Visual Interface) sits somewhere between VGA and HDMI in terms of age. It provides better quality than VGA but doesn’t carry audio signals. You might find it on older monitors and some desktop computers.
Checking Your Laptop and Monitor Compatibility
Knowing which kind of link your devices can handle is important to a workable installation. What kind of cable you’ll need, and whether or not you’ll need an adapter, depends on the relationship between your laptop’s video output ports and your monitor’s video input ports.
Get a closer look at both devices. Your laptop’s ports are along the sides or back, and monitor inputs are on the back and sometimes the bottom edge. The vast majority of modern laptops have at least one option for video output, be that HDMI, USB-C, or DisplayPort.
With most desktop monitors, you have the option of having multiple inputs and can be flexible in how you connect. If you’re fortunate, the port types on your laptop and monitor will match,h and you can use a single cable to connect (cheaper than purchasing separate adapters).
It doesn’t matter, though there are a nearly infinite number of adapters and converter cables to bridge almost any compatibility. For example, if your laptop sports only USB-C but the monitor supports only HDMI, a simple adapter (or an all-purpose cable) will solve the problem.
What You’ll Need to Get Started
Required Items
- Your laptop (obviously!)
- A desktop monitor with a power cable
- The appropriate connection cable (HDMI, DisplayPort, USB-C, etc.)
- Adapters (if your laptop and monitor don’t have matching ports)
- Power outlet for the monitor
Optional but Helpful
- Monitor stand or mount for better ergonomics
- Cable management clips to keep things tidy
- Cleaning cloth to wipe down screens before connecting
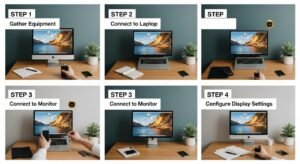
How to Connect a Laptop to a Desktop Monitor: Step-by-Step
Now let’s get to the actual connection process. This is where everything comes together, and you’ll see your laptop display appear on that beautiful big screen.
Step 1: Position Your Monitor
Place your desktop monitor where you want it on your desk. Make sure you have easy access to the back or bottom panel where the input ports are located. Ensure there’s enough space for cable connections and that the monitor won’t be too far from your laptop (cable length matters!).
Step 2: Connect the Power Cable
Plug your monitor’s power cable into an electrical outlet and connect it to the monitor. Some monitors have a separate power brick, while others plug directly into the wall. Don’t turn the monitor on just yet—we’ll do that after everything is connected.
Step 3: Identify the Correct Ports
Look at the back or side of your laptop and identify the video output port(s). Then check your monitor’s input ports. Choose the best matching option based on what’s available. If you have multiple options, HDMI or DisplayPort are generally your best bets for quality and convenience.
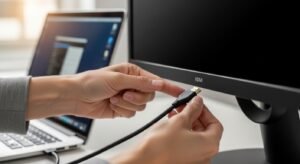
Step 4: Connect the Cable
Take your chosen cable and firmly connect one end to your laptop’s video output port. Then connect the other end to the corresponding input port on your monitor. You should feel a satisfying click or firm connection. If you’re using HDMI or DisplayPort, make sure the cable is fully inserted. For VGA or DVI connections, tighten the screws to secure the connection.
Step 5: Power On the Monitor
Turn on your monitor using its power button. Most monitors will automatically detect the input signal and display your laptop screen. If you see “No Signal” displayed, don’t panic—we’ll address that in the troubleshooting section.
Step 6: Wake Your Laptop
If your laptop is in sleep mode, wake it up. Sometimes laptops need a moment to detect the external display. You might see your screen flicker briefly as it recognizes the new monitor.
Configuring Your Display Settings
Once your hardware is connected, you’ll need to configure how your laptop uses the external monitor. Both Windows and macOS offer flexible display options that let you customize your viewing experience.
Windows Display Configuration
For Windows 10/11 users, press the Windows key + P to bring up the Project menu. You’ll see four options: PC screen only, Duplicate, Extend, and Second screen only. “Duplicate” shows the same content on both screens—great for presentations. “Extend” treats the monitor as additional screen space, letting you drag windows between displays. “Second screen only” turns off your laptop display and uses only the external monitor. Most people working from a desk prefer the “Extend” option for maximum productivity.
To fine-tune your settings, right-click on your desktop and select “Display settings.” Here you can adjust resolution, orientation, and which monitor is your “main display.” You can even rearrange the virtual position of your monitors to match their physical placement on your desk.
macOS Display Configuration
Mac users should click the Apple menu, then System Preferences (or System Settings on newer versions), and select Displays. Click the Arrangement tab to see your connected displays. You can drag the white menu bar to whichever screen you want as your primary display. Check “Mirror Displays” if you want identical content on both screens, or leave it unchecked to extend your desktop across both monitors.
Optimizing Your Display Experience
But getting the connection running is only the first step. Fine-tuning your setup is going to give you that perfect visual experience and it’s also the only way you’ll be able to work with multiple screens in maximum comfort.
“More than you expect the resolution settings to matter.” Your monitor has a native resolution — the number of pixels it was designed to display — and if your system is running in this mode, you’ll get the sharpest image. Windows and macOS recognize or set the optimal resolution by default, however you may want to double-check.
In your display settings, find the resolution marked as “recommended” and select it. If you have to squint to read anything at native resolution, don’t set a lower resolution. Rather, tweak scaling or text sizes to increase readability without losing sharpness.
Refresh rate can also be a consideration, particularly when it comes to gaming or watching videos. It’s perfect for daily use, and you can browse the internet or do other standard tasks look great on any screen 60Hz Most regular monitors are strung to a constant refresh rate of 60 Hz. But if you have a high-refresh-rate monitor (120Hz, 144Hz or higher), set them as high and enable it.
Troubleshooting Common Connection Issues
Even with perfect setup instructions, things don’t always work perfectly the first time. Here are solutions to the most common problems people encounter when connecting external displays.
No Signal Detected
If your monitor displays “No Signal,” first check that all cables are firmly connected at both ends. Verify that you’ve selected the correct input source on your monitor—many monitors have multiple inputs, and you need to manually select the one you’re using. Press the monitor’s input or source button and cycle through until you find the right one. Also, try pressing Windows + P (or using the display detection feature on Mac) to force your laptop to search for the external display.
Blurry or Incorrect Resolution
Blurry text usually means your monitor isn’t running at its native resolution. Go into your display settings and select the resolution marked as “recommended.” If you’re using an adapter, particularly VGA or older DVI, the maximum supported resolution might be limited. In that case, upgrading to an HDMI or DisplayPort connection will likely solve the problem.
Display Flickering or Cutting Out
Intermittent signal problems often point to a loose cable connection or a faulty cable. Disconnect and reconnect both ends of the cable, ensuring a secure fit. If problems persist, try a different cable—cables do fail, especially cheaper ones. Also, make sure your graphics drivers are up to date, as outdated drivers can cause display issues.
Audio Not Playing Through Monitor
If your monitor has built-in speakers but you’re not getting sound, your laptop might still be routing audio to its internal speakers. On Windows, right-click the volume icon in your taskbar, select “Open Sound settings,” and change your output device to the monitor. On Mac, go to System Preferences > Sound > Output and select your monitor from the list.
Final Thought
So, if you’re teaching someone how to connect a laptop to a monitor, it’s an unorthodox but enlightening lesson. Regardless of what ports you have — HDMI, DisplayPort, USB-C, or something else as well as whether there are adapters or dongles in the way of your signal chain, once you understand the essentials, it’s fairly simple.
We’ve discussed everything from how to identify ports and cables to setting up your display and what you can do if things go wrong. The moral of the story is easy: match your ports, use good cable’s and find time to tune in your display settings for the best experience.
Ready to upgrade your workspace? Just grab the cable that works with your gear, follow the recommendations above and then enjoy a more spacious, comfortable display. Your eyes (and your productivity) will thank you. But if you get stuck, go over the troubleshooting section again and check the manuals for your model as well. Happy connecting!