

iPhone has a microphone forever on the ready, waiting to be accessed when you’re dialing into a call, pinging Siri’s brain, or FaceTiming with homies. But you’ve probably wondered: Which apps are listening?
Privacy matters, and understanding how to control your iPhone’s microphone access is vital in the age of digital conveniences. Though, you can’t turn off your microphone at a hardware level without doing something that will significantly impact the functionality of your phone, you do have powerful options right in front of you.
This guide will cover everything you need to know about controlling microphone permissions, safeguarding your privacy, and figuring out what apps actually need access to your mic. Let’s reclaim your audio privacy, together.
Understanding iPhone Microphone Permissions
However, before we get into the technical details, it can pay dividends to explore exactly how iPhone microphone access functions. The same cannot be said of the iPhone: “iOS is based on a per-app permission model, so apps must ask the user for permission to use the mic,” according to Will Strafach, CEO of Guardian Firewall and Guardian Mobile. It’s not mere politeness; rather, it’s a foundational privacy feature that the OS bakes in.
Once you download an app that wants access to the microphone, a pop-up will appear asking for permission. This request is in your hands, either to grant or deny. The genius of this system is that you’re never stuck with your first choice. You can revoke their permissions whenever you like, at which point any apps that previously had access will instantly lose the ability to use your microphone.
Consider it like handing out keys to your house. You don’t pass keys to whoever knocks on your door, do you? The same principle holds for your microphone. Social media apps, games, and utilities often ask for access to microphones, but not all really need it as part of their main function. Knowing this basic principleguidese as you choose which apps could be trusted with audio access (and those that can’t!).
How to Turn Off Microphone Access for Specific Apps
The most practical way to manage your iPhone’s microphone is by controlling which individual apps can use it. This granular approach lets you maintain functionality where you need it while blocking access where you don’t.
Step 1: Open the Settings app on your iPhone. It’s the gray icon with gears that you’ll find on your home screen.
Step 2: Scroll down and tap on “Privacy & Security.” This is your command center for all privacy-related settings on iOS.
Step 3: Tap on “Microphone” near the top of the menu. You’ll see a comprehensive list of every app that has requested microphone access.
Step 4: Review the list carefully. Apps with green toggles currently have access, while gray toggles indicate denied access.
Step 5: Toggle off any app you don’t want accessing your microphone. The switch will turn from green to gray, immediately revoking that app’s ability to record audio.
Step 6: Consider each app’s purpose. Video calling apps like Zoom or FaceTime obviously need microphone access, but does that puzzle game really need to listen to you?
This method gives you precise control without compromising your iPhone’s basic functionality. Your phone calls will still work perfectly, and essential features remain intact while you block unnecessary access from apps that don’t need it.
Checking Which Apps Are Currently Using Your Microphone
Apple added a fantastic transparency feature that allows you to see in real time when apps tap into your microphone. Check the top-right corner of your iPhone screen, next to your battery icon. When an app is utilizing your microphone, you’ll notice a small orange dot. This visual signal is your reassurance that your privacy is protected, and it lets you know when the recording function’s been turned on.
It works everywhere on your system, even if you’re at the home screen, inside an app, or when your phone is unlocked and an app is running in the background. The orange dot indicates when any app is tapping into your microphone and goes away once it has stopped.
Swipe down to access Control Center right after you notice the orange dot, and at the top of the screen you will see which particular app caused it, complete with its icon and name. This transparency power lets you discover apps that may be listening when they shouldn’t, giving you the proof and ability to revoke their permissions right then and there.
Disabling Microphone for Siri and Dictation
Siri is deeply integrated into your iPhone experience, but you might prefer to limit or disable voice-activated features. Managing Siri’s microphone access requires a slightly different approach than regular apps.
Step 1: Open Settings and scroll down to “Siri & Search.”
Step 2: You’ll see several options here. Toggle off “Listen for ‘Hey Siri'” to prevent Siri from constantly listening for her wake phrase.
Step 3: Toggle off “Press Side Button for Siri” (or “Press Home for Siri” on older models) if you want to completely disable Siri activation.
Step 4: For dictation, go back to Settings, then tap “General.”
Step 5: Scroll down and select “Keyboard.”
Step 6: Toggle off “Enable Dictation” to prevent your iPhone from converting speech to text.
Keep in mind that disabling these features means you’ll lose convenient voice controls and hands-free functionality. However, if privacy is your primary concern, this trade-off might be worthwhile for your peace of mind.

How to Turn Off Microphone During Calls and FaceTime
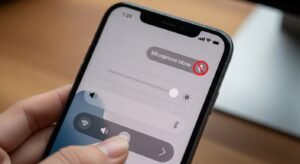
During active calls, you have quick access to mute your microphone, which is different from permanently disabling access. This is particularly useful when you need temporary privacy or want to eliminate background noise.
For Regular Phone Calls:
Step 1: During an active call, look for the “Mute” button on your screen. It typically shows a microphone icon.
Step 2: Tap the mute button once. The icon will change appearance (usually turning white or showing a line through it) to indicate your microphone is off.
Step 3: The other person can no longer hear you, but you can still hear them perfectly.
Step 4: Tap the button again to unmute when you’re ready to speak.
For FaceTime Calls:
Step 1: Locate the microphone icon during your FaceTime call.
Step 2: Tap it to mute yourself. You’ll see a visual indicator that your microphone is disabled.
Step 3: Tap again to reactivate your microphone.
This temporary control is perfect for conference calls, virtual meetings, or any situation where you need quick control over when you’re heard.
Restricting Microphone Access System-Wide
For parents or anyone managing devices for others, iOS offers Screen Time restrictions that can limit microphone access across the entire system. This is particularly valuable for children’s devices or situations requiring extra security.
Step 1: Open Settings and tap “Screen Time.”
Step 2: If you haven’t set up Screen Time before, tap “Turn On Screen Time” and follow the prompts.
Step 3: Tap “Content & Privacy Restrictions.”
Step 4: Enable Content & Privacy Restrictions by toggling the switch at the top.
Step 5: Scroll down and tap “Microphone” under the Allow Changes section.
Step 6: Select “Don’t Allow” to prevent any new apps from requesting microphone access.
This creates a system-wide block that’s protected by your Screen Time passcode. Existing permissions remain unchanged, but no new apps can gain microphone access until you reverse this setting. It’s an excellent layer of protection when combined with individual app management.
Understanding When You Actually Need Microphone Access
Not every app that requests microphone access actually needs it for legitimate functionality. Developing a critical eye for these requests helps you protect your privacy without sacrificing useful features. Communication apps like WhatsApp, Messenger, and Telegram genuinely need microphone access for voice messages and calls—that’s their core purpose.
Video conferencing tools like Zoom, Microsoft Teams, and Google Meet are obvious examples where denying access would make the app useless.
However, many other categories are less clear-cut. Social media platforms often request microphone access for features you might rarely use, like recording videos directly within the app. Gaming apps sometimes want microphone access for in-game chat features you may never utilize.
Even some shopping or productivity apps request permissions that seem tangential to their main function. Before granting access, ask yourself whether you’ll actually use the microphone-dependent features the app offers. If you’re downloading a photo editing app that wants to record audio, question why that’s necessary.
The same applies to flashlight apps, calculator apps, or simple utilities that have no obvious reason to listen to your environment. When in doubt, deny access initially and see if the app still functions adequately for your needs.
Troubleshooting Common Microphone Issues
You might sometimes have issues after changing permissions. If an app you know to be legitimate is suddenly unable to access your microphone, return to the Privacy & Security settings and ensure that the toggle beside this specific app is green.
Sometimes, apps will need to be force-closed and reopened following permission changes before they’ll acknowledge the new settings — double-tap your home button (or perform a swipe-up gesture from the bottom of the screen) and then swipe away the app, relaunching it when done.
Software bugs can be the cause of microphone issues, too. If your microphone appears to be completely dead across all apps, try restarting your iPhone by holding down the power button and following the shutdown prompts.
For stubborn problems that persist after a restart, look to see if there are updates for your iOS device in the Settings app under General and Software Update — bugs in older software versions can occasionally interfere with microphone operation.
Privacy Best Practices for iPhone Microphone Management
Maintaining good microphone hygiene on your iPhone is an ongoing process, not a one-time setup. Make it a habit to review your microphone permissions quarterly—set a reminder on your calendar to audit which apps have access. Delete apps you no longer use rather than just leaving them on your device with active permissions.
When you see that orange dot indicator appear unexpectedly, investigate immediately by checking Control Center to identify the culprit.
Be especially cautious with apps from unknown developers or those with poor privacy reputations. Read privacy policies before installing apps, particularly for free apps that might monetize your data in unexpected ways.
Consider whether cloud-based voice assistants align with your privacy preferences, as these services send audio recordings to company servers for processing. Layer your privacy protections by combining microphone restrictions with location services management, camera permissions review, and regular privacy checkups through Settings.
Final Thought
Learning how to disable the microphone on an iPhone is not about paranoia; rather, it’s one of the smartest decisions you ever make about your digital privacy. You’ve learned how to: manage app permission settings for individual apps in Privacy & Security settings;
keep an eye on when your microphone is being used in real-time from the orange dot indicator; turn off Siri and dictation features; mute yourself during calls while using a headset or wired earphones; and apply system-wide restrictions via Screen Time.
Privacy is a spectrum, and the position you gravitate toward on that spectrum is ultimately up to your comfort level and needs. One of the most important things to know is that at no point are you locked into a decision about permissions. With your iPhone, you have total freedom to allow and disallow microphone usage as it suits your needs and worries.
Begin today by pulling up the Settings app and taking a look at which apps currently have access to the microphone — you might be startled at what you discover. Spend five minutes now reviewing the permissions you’ve granted and taking away access from apps that don’t need it.