

Taking underwater photos with an iPhone can feel tricky at first, but with the right setup and techniques, you can capture stunning shots in pools, rivers, and even shallow ocean water. If you’ve ever asked how to take underwater photos with iPhone, this guide will walk you through everything—from preparation and safety to camera settings and shooting techniques.
Modern iPhones are water-resistant, not waterproof cameras, so knowing the limits and best practices is critical. Let’s break it all down step by step.
How to take underwater photos with iPhone Safely
Before learning how to take underwater photos with iPhone, it’s important to understand what your device can safely handle.
Most recent iPhone models are water-resistant, meaning they can survive splashes and brief submersion—but they are not designed for deep or long underwater use.
iPhone Water Resistance Ratings
- iPhone 11 and newer: Rated up to 6 meters for 30 minutes (varies by model)
- Water resistance can weaken over time
- Saltwater is more damaging than freshwater
👉 Apple does not cover water damage under warranty, so extra protection is always recommended.
How to Take Underwater Photos With iPhone Using a Waterproof Case
Using a waterproof case is the safest and most reliable way to protect your phone and improve photo quality.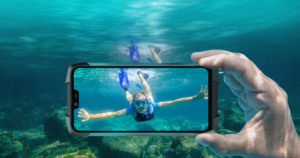
Why a Waterproof Case Matters
- Protects against pressure and leaks
- Allows deeper underwater photography
- Improves grip and control
- Prevents saltwater corrosion
Choosing the Right Case
Look for:
- IP68-rated waterproof case
- Touch-sensitive screen cover
- Clear lens window
- Depth rating clearly listed
This step alone greatly increases your chances of success when learning how to take underwater photos with iPhone.
Introduction to Underwater Photography with an iPhone
Underwater photography can be captivating, and with your iPhone in hand, the process has never been easier. Think about capturing colorful coral reefs, friendly fish and tranquil underwater scenes — all from your smartphone. Our underwater cameras are no longer giant, cumbersome contraptions. Today, you can explore this exciting world with nothing but the simplest of tools.
Whether you’re going on a tropical holiday or checking out the local lakes and rivers, your iPhone can make an awesome underwater camera provided it doesn’t take water damage. With a little preparation and some imagination, you can make images that highlight the vivid colors and graceful flowing forms beneath the surface. Ready to make a splash? So, let’s find out how you can shoot underwater with your iPhone like a professional photographer?
iPhone Underwater Photography Settings You Should Use
Knowing the right iPhone camera settings can dramatically improve underwater image quality.
Best Camera Settings for Underwater Shots
- Turn on Gridlines (for better composition)
- Disable Flash (it creates backscatter underwater)
- Use Photo mode instead of Video for clarity
- Enable Live Photos to capture movement
- Turn on Burst Mode for action shots
Water reduces sharpness, so taking multiple images increases the chance of getting a clear one.
Benefits of Taking Underwater Photos with an iPhone
Using an iPhone to take underwater photos unlocks creativity. It has a small form factor, and easy to use during swimming or diving.
You’re bringing back stunning underwater footage of exotic marine life and colorful coral reef without all the unreliable, clunky camera gear. But it’s this availability that makes for some of the more off-the-cuff adventures, and simply shoot moments as they occur.
Recent iPhones have especially high quality cameras, able to perform exceptionally in different lighting. Combine that with their capability to shoot at a high resolution and your underwater pictures can end up looking crystal clear.
Plus, you can easily post these stunning shots on social media. You can easily inspire friends and family alike with a quick tap of the screen.
Underwater photography also serves as a means of bringing people closer to nature. It encourages venturing into uncharted territories and reveals the beauty underneath, which most people would miss.
How to Take Underwater Photos on iPhone Step by Step
Here’s a simple step-by-step guide you can follow every time.
Step 1: Clean the Lens
Even a tiny smudge or water droplet can ruin underwater photos. Clean the lens before sealing your phone.
Step 2: Seal the Waterproof Case
Double-check the seal. Test it with tissue paper before putting your phone inside.
Step 3: Use Volume Buttons to Shoot
Touchscreens don’t always respond underwater. Use the volume buttons to take photos instead.
Step 4: Hold the Phone Steady
Water movement causes blur. Use two hands and move slowly.
Step 5: Get Close to the Subject
Water reduces clarity. The closer you are, the sharper the image.
This process makes how to take underwater photos with iPhone much easier and safer.
Preparing Your iPhone for Underwater Photography
Before diving into the waters, ensure your iPhone is ready for an underwater adventure. Start with a reliable waterproof case or housing designed specifically for your model. Look for options that offer full access to buttons and touchscreen functionalities while keeping water out.
Consider additional accessories like floating straps. This small investment can save you from losing your phone in deeper waters. A lens attachment can also enhance image quality, giving you wider views or macro capabilities.
Don’t forget about cleaning the lens before each shoot—any smudges may ruin that perfect shot. Securely seal all compartments of your case to prevent any leaks during use.
Lastly, take some time to familiarize yourself with how to operate your phone within its protective casing; this practice will help when you’re submerged and aiming for that stunning capture.
How to Take Underwater Photos With iPhone in Pools vs Ocean
Pool Photography Tips
- Water is clearer
- Lighting is more predictable
- Less damage risk
- Great for beginners
Ocean Photography Tips
- Avoid strong waves
- Stay shallow
- Rinse phone immediately after use
- Never dive deep without a rated case
Saltwater is one of the biggest threats to iPhone water resistance.
Lighting Tips for Better Underwater iPhone Photos
Lighting is one of the biggest challenges in iPhone underwater photography.
Best Lighting Practices
- Shoot during midday sunlight
- Keep the sun behind you
- Avoid shadows and murky water
- Do not rely on iPhone flash
Natural light produces cleaner and more colorful underwater photos.
Common Mistakes to Avoid When Taking Underwater Photos
Many beginners damage their phones or get poor results by making these mistakes:
- Submerging without a waterproof case
- Going deeper than the phone’s depth rating
- Using flash underwater
- Staying underwater too long
- Not rinsing phone after saltwater use
Avoiding these mistakes is key when mastering how to take underwater photo with iPhone.
Editing Underwater Photos Taken With iPhone
Underwater images often look flat or blue. Editing helps bring them to life.
Simple Editing Tips
- Increase contrast
- Adjust white balance
- Boost clarity slightly
- Reduce blue or green tint
- Crop for better framing
You don’t need heavy editing—small adjustments go a long way.
Is It Safe to Take Underwater Photos With iPhone?
The short answer: Yes, but with caution.
If you:
- Stay within shallow depths
- Use a waterproof case
- Avoid saltwater exposure
- Dry and clean your phone afterward
Then learning how to take photos underwater with iphone can be both fun and safe.
Final Thoughts:
Taking underwater photos with an iPhone is absolutely possible when done the right way. With proper protection, smart camera settings, and careful handling, you can capture amazing underwater moments without risking your device.
If you remember only one thing: use a waterproof case and stay shallow.
Master these basics, and how to take underwater photos with iPhone becomes an exciting creative skill rather than a risky experiment.