

Whether you’ve just captured breathtaking mountain bike trails, underwater adventures, or family moments, how to get GoPro footage onto Mac Mac is the crucial first step in sharing your stories.
While the process might seem straightforward, many users encounter unexpected challenges—from slow transfer speeds to unrecognized devices. This comprehensive guide walks you through every method available to transfer your footage efficiently, helping you choose the best approach based on your specific needs.
You’ll discover not only the standard USB connection method but also wireless options, SD card readers, and cloud-based solutions that can save you time and frustration. Let’s transform those amazing recordings into edited masterpieces ready for the world to see.
How GoPro Model Works With macOS
Before diving into transfer methods, it’s essential to identify which GoPro model you own and ensure your Mac system meets the necessary requirements. Modern GoPro cameras from the HERO7 series onward offer enhanced connectivity options including USB-C ports and improved Wi-Fi capabilities, while older models like the HERO5 and HERO6 use micro-USB connections.
Your Mac’s operating system should ideally run macOS 10.14 (Mojave) or later for optimal compatibility with GoPro’s software suite. The file format your GoPro uses also matters. Most recent models record in HEVC (H.265) format, which offers better compression but requires newer Macs with sufficient processing power for smooth playback.
If you’re working with a Mac from 2016 or earlier, you might experience performance issues with 4K HEVC files. Checking these compatibility factors beforehand prevents workflow interruptions and ensures your hardware can handle the high-resolution footage you’ve captured.
Method 1: Direct USB Cable Connection
The most reliable how to get GoPro footage onto Mac is through a direct USB cable connection. This method provides fast transfer speeds and doesn’t rely on wireless signals or additional hardware.
Step-by-Step USB Transfer Process
- Power on your GoPro and ensure the battery has sufficient charge (at least 25% recommended)
- Connect the USB cable that came with your GoPro to both the camera and your Mac’s USB port
- Select “Connect to Computer” or “MTP Mode” when prompted on your GoPro’s screen
- Wait for your Mac to recognize the device—it should appear in Finder under “Locations”
- Open Finder and navigate to your GoPro device, then locate the “DCIM” folder
- Browse to the specific folder containing your footage (usually labeled with a number like “100GOPRO”)
- Select the files you want by clicking individual clips or pressing Command+A to select all
- Drag and drop the files to your desired location on your Mac, such as your Desktop or Movies folder
- Monitor the transfer progress in the Finder window—larger 4K files may take several minutes
- Safely eject your GoPro by clicking the eject icon next to the device name before disconnecting
Optimizing USB Transfer Speed
Transfer speeds can vary dramatically based on several factors. Using the original GoPro cable or a high-quality USB-C cable ensures maximum bandwidth, especially when transferring large 4K or 5K files.
If your Mac has USB-C ports and your GoPro footage supports it, this connection typically delivers speeds of 400-500 MB/s compared to older USB 2.0’s 35-60 MB/s. Closing unnecessary applications during transfer prevents system resource competition and maintains consistent speeds.
Additionally, transferring files to your Mac’s internal SSD rather than an external drive initially can speed up the process—you can always move files to external storage afterward. If transfers seem unusually slow, try a different USB port or restart both your GoPro and Mac to reset the connection.
Method 2: Using an SD Card Reader
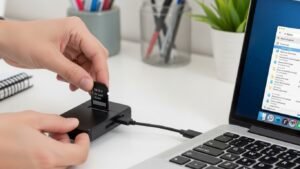
For many content creators, an SD card reader offers the fastest and most convenient method to import GoPro footage. This approach bypasses the camera entirely, reducing battery drain and often providing superior transfer speeds.
Simply remove the microSD card from your GoPro footage by opening the side door and gently pressing the card until it clicks and releases. Insert the card into your SD card adapter (if you have a microSD to SD adapter), then insert it into your Mac’s SD card slot if available. Newer MacBook Pro and MacBook Air models lack built-in card readers, requiring a USB-C SD card reader adapter.
Once inserted, the card appears as a mounted drive in Finder, allowing you to navigate to the DCIM folder and copy files just as you would with the USB method. This technique is particularly valuable when you need to continue shooting—swap out a full card, insert a fresh one into your GoPro footage, and transfer footage simultaneously.
Method 3: Wireless Transfer with GoPro Quik App
The GoPro Quik app provides a wireless solution how to get GoPro footage onto Mac, though it’s worth noting this method works best for selecting highlight clips rather than transferring entire recording sessions. Download GoPro Quik from the Mac App Store, then ensure both your Mac and GoPro are connected to the same Wi-Fi network.
Wireless Transfer Walkthrough
- Launch the GoPro Quik app on your Mac and create an account if you haven’t already
- Power on your GoPro and enable Wi-Fi from the camera’s menu
- Connect your Mac to the GoPro’s Wi-Fi network (the network name and password display on the GoPro screen)
- Open Quik and select “Add Media” from the import options
- Choose your GoPro device from the list of available cameras
- Browse through thumbnails of your footage and select clips you want to transfer
- Click “Import” and choose your destination folder
- Wait for the transfer to complete—wireless speeds are slower than USB but convenient for quick previews
Wireless transfer works beautifully for grabbing specific clips or creating quick edits, but transferring hours of 4K footage wirelessly is impractical due to speed limitations and battery consumption.
How to Get GoPro Footage Onto Mac Without Using Step-by-Step Instructions
Sometimes the problem is not the method but the mindset. Many users try one approach, it fails once, and they assume something is broken. In reality, macOS may simply be waiting for permission, power, or a proper connection.
If your GoPro footage does not appear, think about the basics. Is the cable designed for data or just charging? Is the camera unlocked and turned on? Is the SD card formatted correctly? These small details matter more than advanced settings.
Another overlooked issue is storage space. GoPro footage is large, especially at 4K or high frame rates. If your Mac is low on space, transfers may fail silently. Keeping at least 20 to 30 percent of your drive free makes a real difference.
Finally, patience helps. When importing many large files, Finder may look frozen while it indexes data. Let it finish before unplugging anything.
Troubleshooting Common Transfer Issues
When Your Mac Doesn’t Recognize Your GoPro
If your Mac fails to detect your GoPro footage when connected via USB, several solutions typically resolve the issue. First, verify you’ve selected the correct connection mode on your GoPro footage—some models default to charging mode rather than data transfer mode.
Try using a different USB cable, as damaged cables are a common culprit. Restarting both devices often clears temporary glitches in the connection handshake. Check your Mac’s System Settings under Privacy & Security to ensure proper permissions are granted for external devices.
Sometimes, resetting your GoPro’s connections (found in the camera’s preferences menu) and forgetting the device on your Mac before reconnecting establishes a fresh connection. If problems persist, updating your GoPro’s firmware through the official GoPro website frequently resolves compatibility issues with newer macOS versions.
Dealing with Corrupted Files
Occasionally, files may appear corrupted or unplayable after transfer. Before assuming the worst, try opening the file in a different media player like VLC Media Player, which handles various codecs better than QuickTime. The issue might be codec-related rather than actual file corruption. If a file truly is corrupted, check if it plays directly on the GoPro footage—if it does, the problem occurred during transfer.
Running the transfer again with a different method (switching from wireless to USB, for example) often produces a clean copy. For valuable footage that won’t transfer properly, specialized data recovery software like Disk Drill can sometimes recover files from the SD card.
Always safely eject your GoPro and SD card to prevent corruption, and never delete files from the card until you’ve verified they transferred successfully and play correctly on your Mac.
Best Practices for Managing GoPro Footage on Mac
Organizing your footage immediately after import saves countless hours of frustration later. Create a consistent folder structure such as organizing by date, project, or location. For example: “GoPro Footage > 2026 > January > Ski Trip.” This systematic approach makes finding specific clips effortless when you’re editing weeks or months later.
Consider using macOS’s tagging system to mark clips as “Favorites,” “B-Roll,” or “Needs Editing.” When transferring, rename generic GoPro file names (like GX010123.MP4) to descriptive names immediately—your future self will thank you.
Invest in external storage for archiving raw footage, as 4K and 5K files quickly consume internal SSD space. Cloud backup services like Backblaze or external drives with automatic backup software provide insurance against data loss. Finally, always keep your original files intact until your edited project is complete; storage is cheap, but reshooting is expensive.
Final Thoughts
Mastering how to get GoPro footage onto Mac opens the door to transforming your raw adventures into polished content. Whether you choose the reliability of USB cable connections, the speed of SD card readers, the convenience of wireless transfer, or the flexibility of cloud-based solutions, each method serves specific needs and workflows.
The key is selecting the approach that matches your shooting style, volume of footage, and editing timeline. Start by trying the direct USB method for its simplicity and reliability, then explore other options as your needs evolve.
Remember to maintain good file organization habits from the start, safely eject devices to prevent corruption, and keep your GoPro footage firmware updated for optimal compatibility. Now that you’ve successfully transferred your footage, it’s time to dive into editing and share your incredible moments with the world. What amazing story will you tell first?